It’s a common situation: you create a site and it’s ready to go. It’s all on GitHub. But you’re not really done. You need to set up deployment. You need to set up a process that runs your tests for you and you’re not manually running commands all the time. Ideally, every time you push to master, everything runs for you: the tests, the deployment… all in one place.
Previously, there only few options here that could help with that. You could piece together other services, set them up, and integrate them with GitHub. You could also write post-commit hooks, which also help.
But now, enter GitHub Actions.
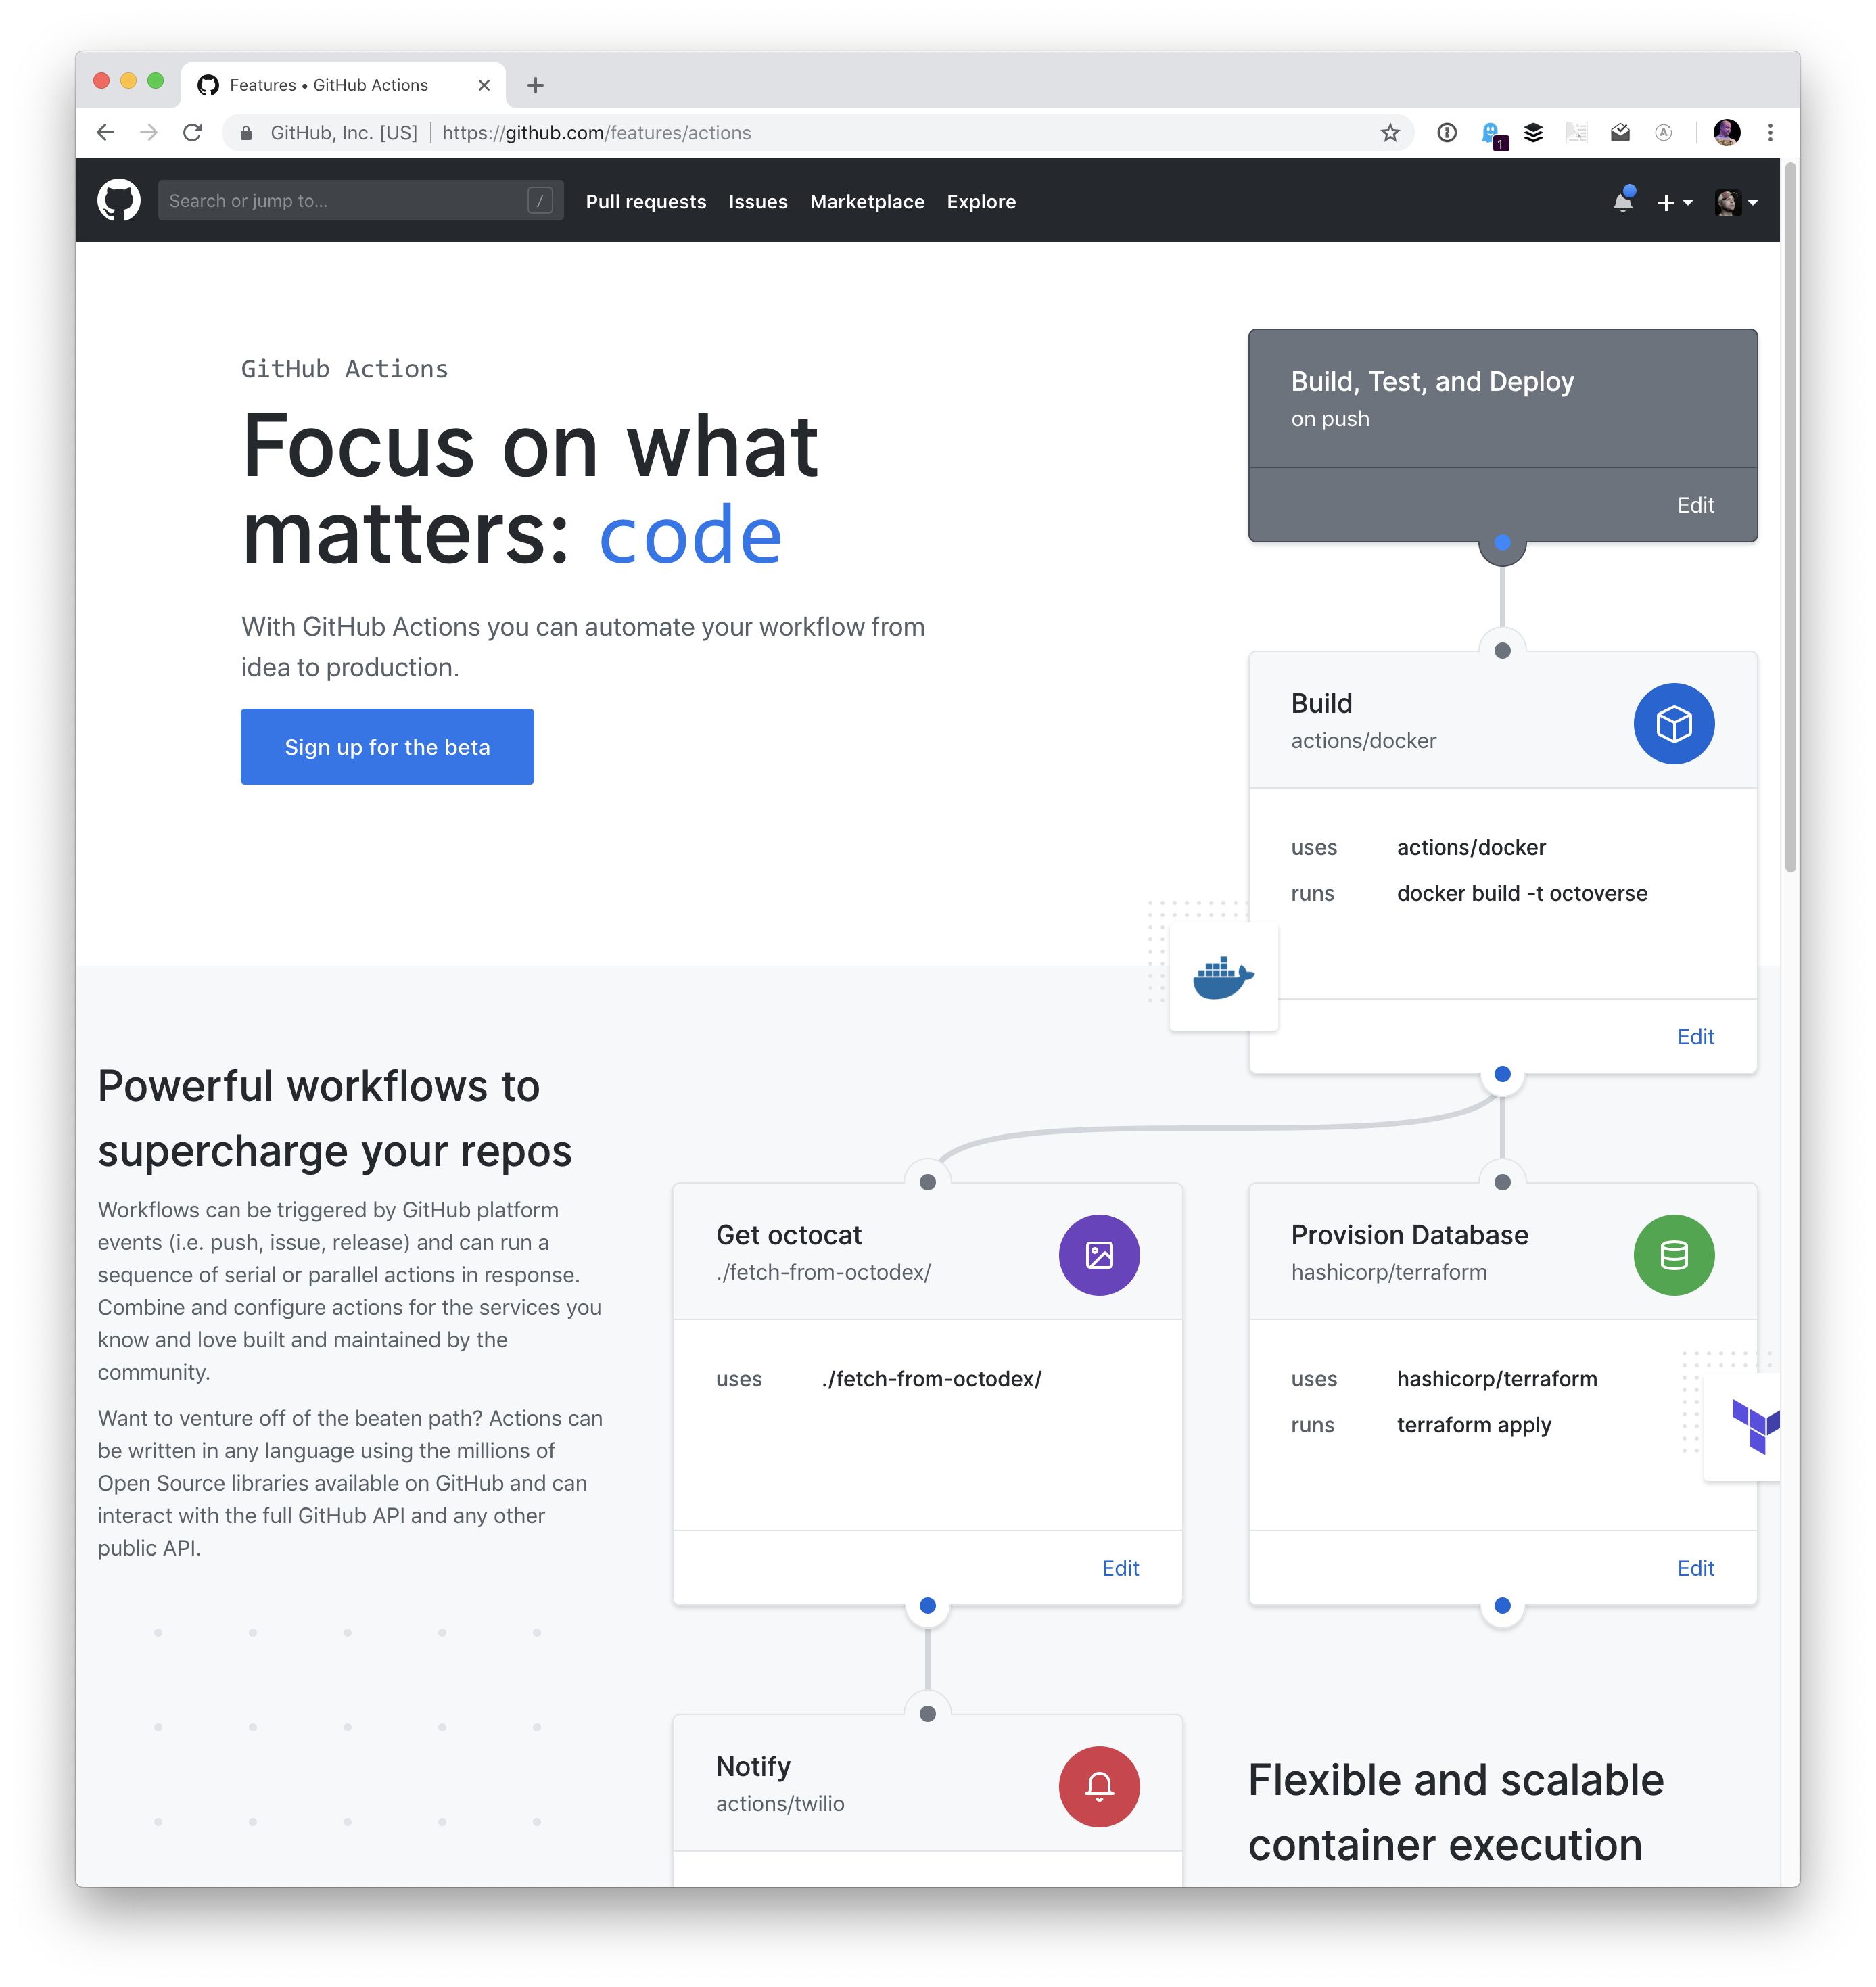
Actions are small bits of code that can be run off of various GitHub events, the the most common of which is pushing to master. But it’s not necessarily limited to that. They’re all directly integrated with GitHub, meaning you no longer need a middleware service or have to write a solution yourself. And they already have many options for you to choose from. For example, you can publish straight to npm and deploy to a variety of cloud services, (Azure, AWS, Google Cloud, Zeit… you name it) just to name a couple.
But actions are more than deploy and publish. That’s what’s so cool about them. They’re containers all the way down, so you could quite literally do pretty much anything — the possibilities are endless! You could use them to minify and concatenate CSS and JavaScript, send you information when people create issues in your repo, and more… they sky really is the limit.
You also don’t need to configure/create the containers yourself, either. Actions let you point to someone else’s repo, an existing Dockerfile, or a path, and the action will behave accordingly. This is a whole new can of worms for open source possibilities, and ecosystems.
Setting up your first action
There are two ways you can set up an action: through the workflow GUI or by writing and committing the file by hand. We’ll start with the GUI because it’s so easy to understand, then move on to writing it by hand because that offers the most control.
First, we’ll sign up for the beta by clicking on the big blue button here. It might take a little bit for them to bring you into the beta, so hang tight.
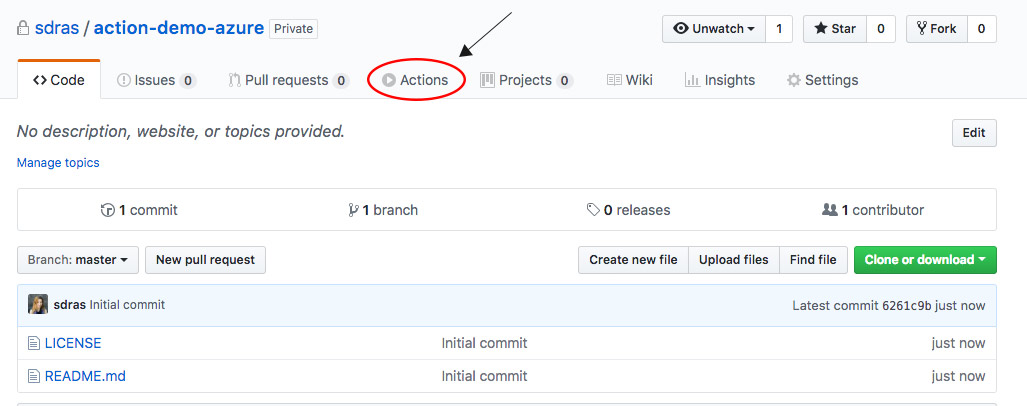
Now let’s create a repo. I made a small demo repo with a tiny Node.js sample site. I can already notice that I have a new tab on my repo, called Actions:
If I click on the Actions tab, this screen shows:
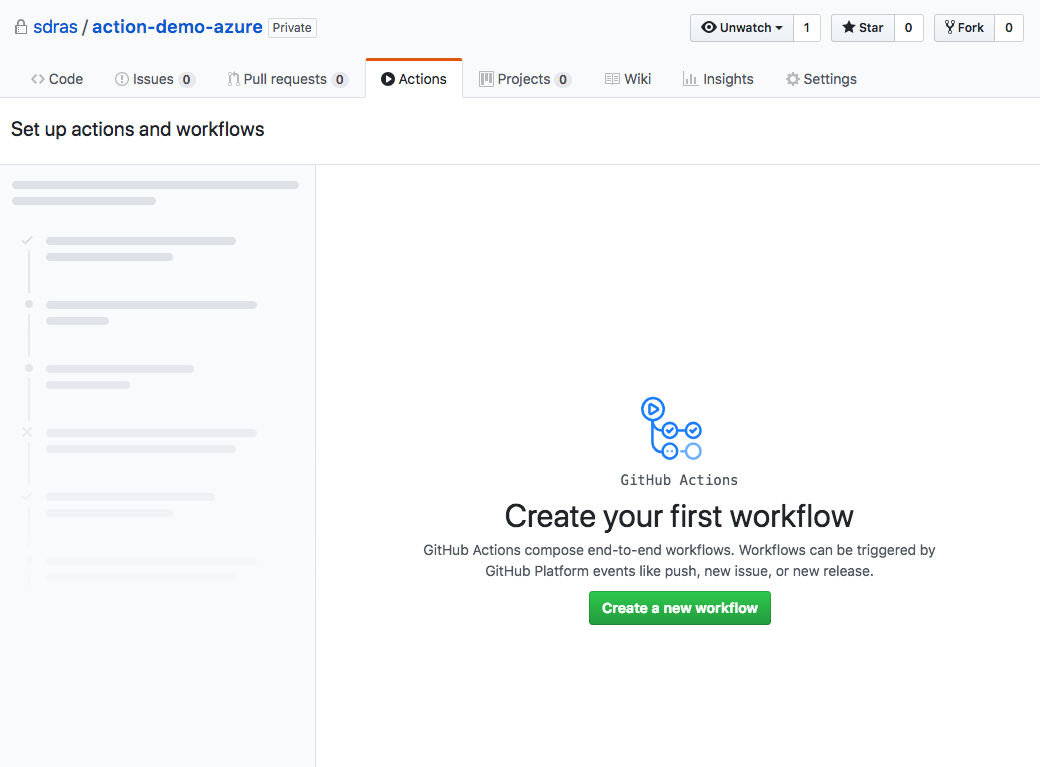
I click “Create a New Workflow,” and then I’m shown the screen below. This tells me a few things. First, I’m creating a hidden folder called .github, and within it, I’m creating a file called main.workflow. If you were to create a workflow from scratch (which we’ll get into), you’d need to do the same.
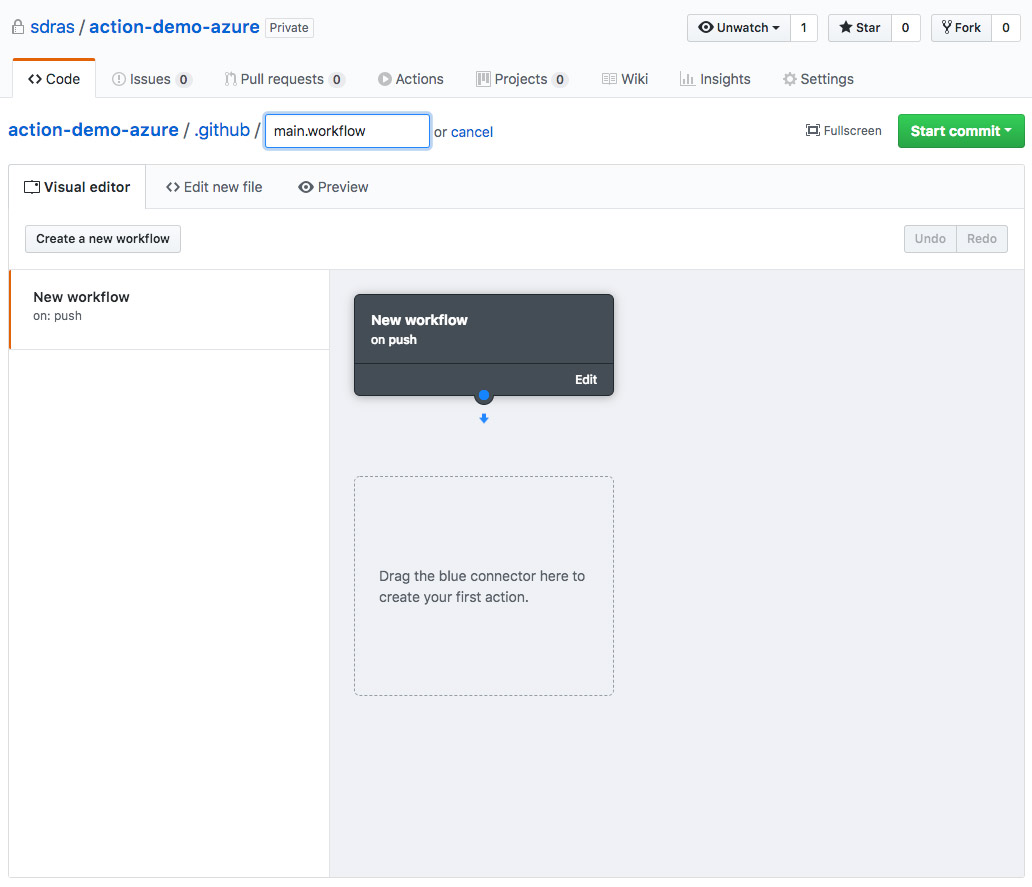
Now, we see in this GUI that we’re kicking off a new workflow. If we draw a line from this to our first action, a sidebar comes up with a ton of options.
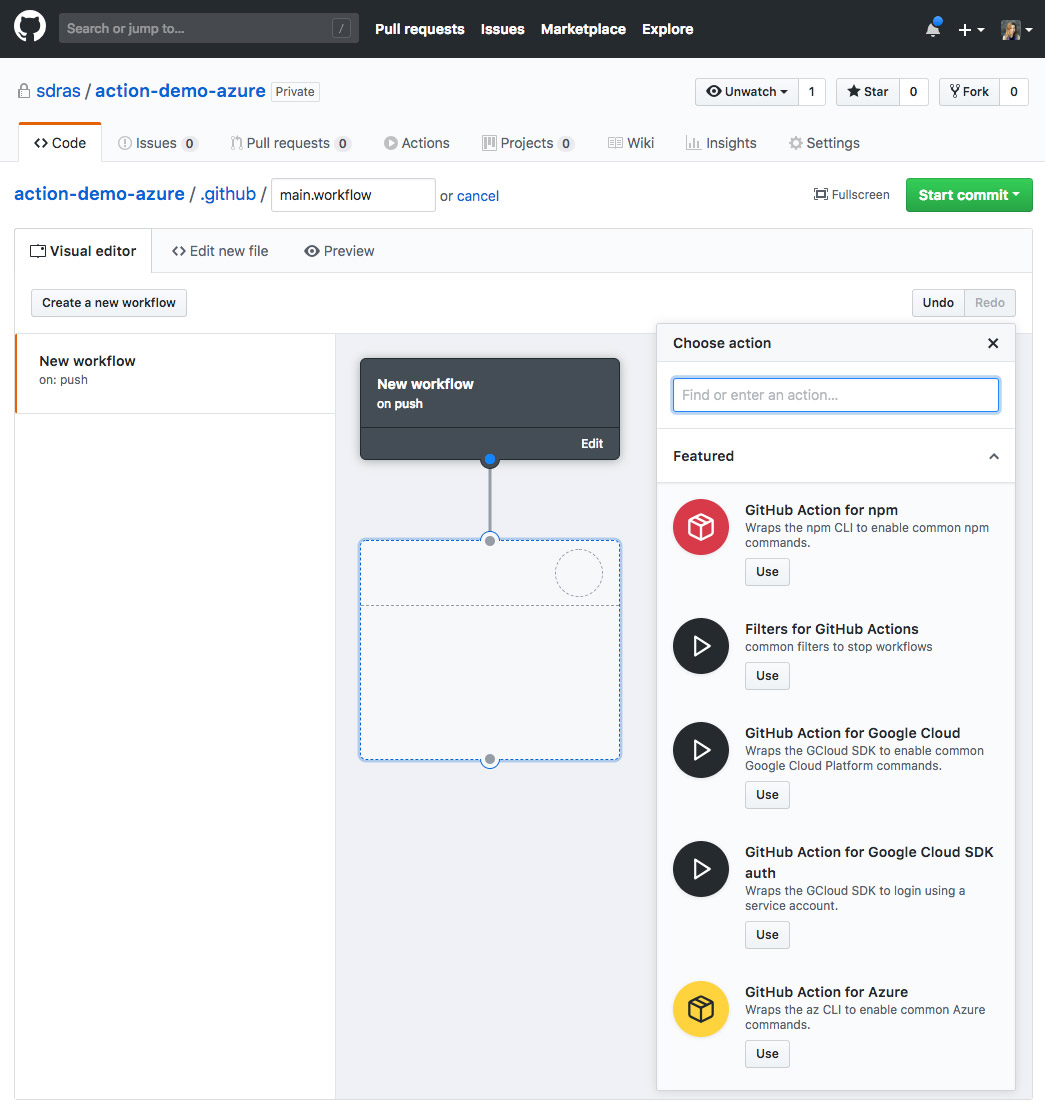
There are actions in here for npm, Filters, Google Cloud, Azure, Zeit, AWS, Docker Tags, Docker Registry, and Heroku. As mentioned earlier, you’re not limited to these options — it’s capable of so much more!
I work for Azure, so I’ll use that as an example, but each action provides you with the same options, which we’ll walk through together.
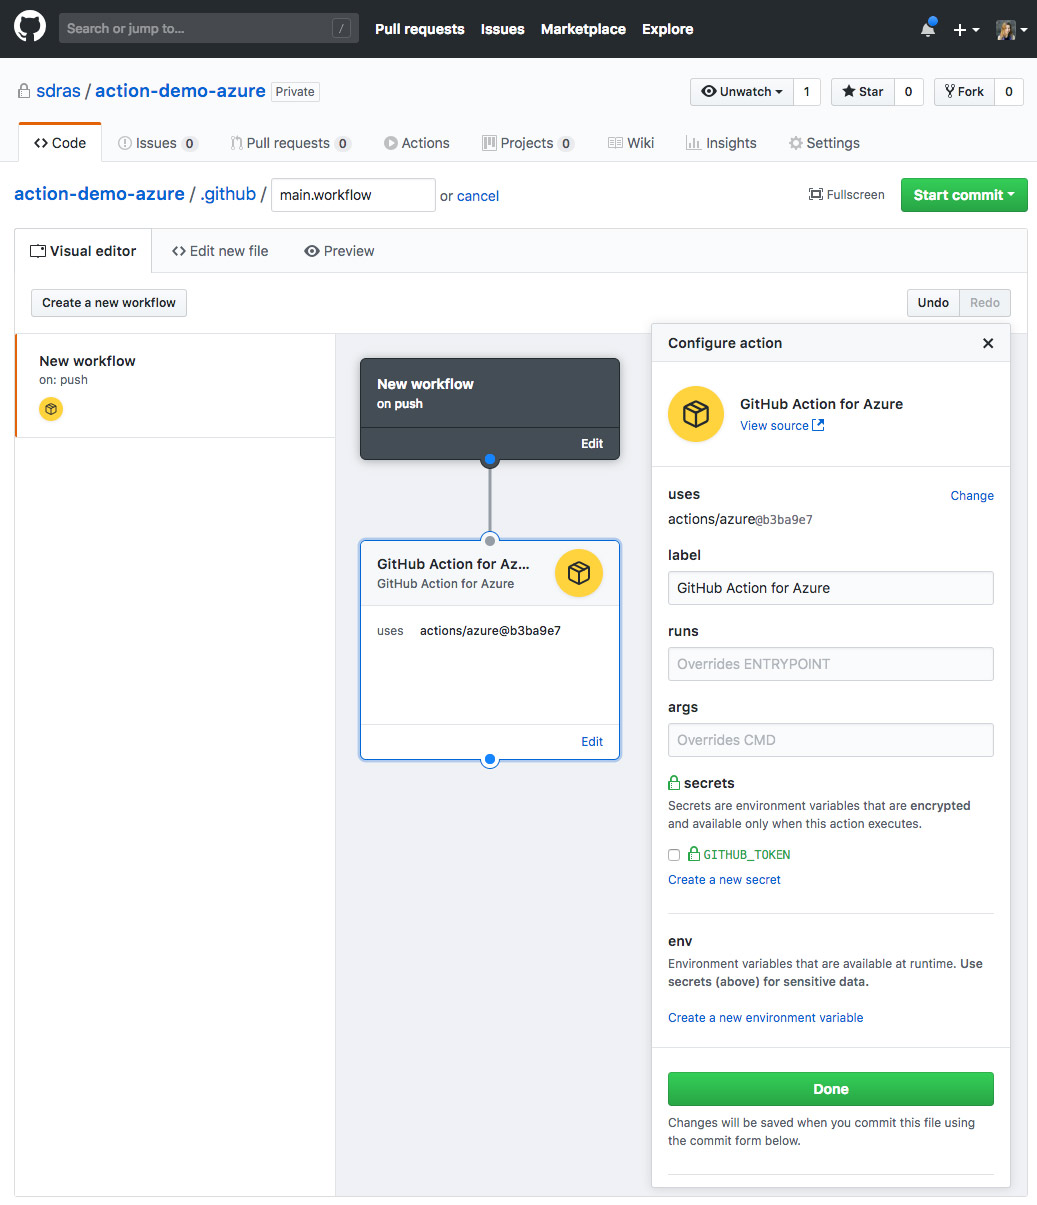
At the top where you see the heading “GitHub Action for Azure,” there’s a “View source” link. That will take you directly to the repo that’s used to run this action. This is really nice because you can also submit a pull request to improve any of these, and have the flexibility to change what action you’re using if you’d like, with the “uses” option in the Actions panel.
Here’s a rundown of the options we’re provided:
- Label: This is the name of the Action, as you’d assume. This name is referenced by the Workflow in the
resolvesarray — that is what’s creating the connection between them. This piece is abstracted away for you in the GUI, but you’ll see in the next section that, if you’re working in code, you’ll need to keep the references the same to have the chaining work. - Runs allows you to override the entry point. This is great because if you’d like to run something like
gitin a container, you can! - Args: This is what you’d expect — it allows you to pass arguments to the container.
- secrets and env: These are both really important because this is how you’ll use passwords and protect data without committing them directly to the repo. If you’re using something that needs one token to deploy, you’d probably use a secret here to pass that in.
Many of these actions have readmes that tell you what you need. The setup for “secrets” and “env” usually looks something like this:
action "deploy" { uses = ... secrets = [ "THIS_IS_WHAT_YOU_NEED_TO_NAME_THE_SECRET", ]
}
You can also string multiple actions together in this GUI. It’s very easy to make things work one action at a time, or in parallel. This means you can have nicely running async code simply by chaining things together in the interface.
Writing an action in code
So, what if none of the actions shown here are quite what we need? Luckily, writing actions is really pretty fun! I wrote an action to deploy a Node.js web app to Azure because that will let me deploy any time I push to the repo’s master branch. This was super fun because now I can reuse it for the rest of my web apps. Happy Sarah!
Create the app services account
If you’re using other services, this part will change, but you do need to create an existing service in whatever you’re using in order to deploy there.
First you’ll need to get your free Azure account. I like using the Azure CLI, so if you don’t already have that installed, you’d run:
brew update && brew install azure-cliThen, we’ll log in to Azure by running:
az loginNow, we’ll create a Service Principle by running:
az ad sp create-for-rbac --name ServicePrincipalName --password PASSWORDIt will pass us this bit of output, that we’ll use in creating our action:
{ "appId": "APP_ID", "displayName": "ServicePrincipalName", "name": "http://ServicePrincipalName", "password": ..., "tenant": "XXXXXXXX-XXXX-XXXX-XXXX-XXXXXXXXXXXX"
}
What’s in an action?
Here is a base example of a workflow and an action so that you can see the bones of what it’s made of:
workflow "Name of Workflow" { on = "push" resolves = ["deploy"]
}
action "deploy" { uses = "actions/someaction" secrets = [ "TOKEN", ]
}
We can see that we kick off the workflow, and specify that we want it to run on push (on = "push"). There are many other options you can use as well, the full list is here.
The resolves line beneath it resolves = ["deploy"] is an array of the actions that will be chained following the workflow. This doesn’t specify the order, but rather, is a full list of everything. You can see that we called the action following “deploy” — these strings need to match, that’s how they are referencing one another.
Next, we’ll look at that action block. The first uses line is really interesting: right out of the gate, you can use any of the predefined actions we talked about earlier (here’s a list of all of them). But you can also use another person’s repo, or even files hosted on the Docker site. For example, if we wanted to execute git inside a container, we would use this one. I could do so with: uses = "docker://alpine/git:latest". (Shout out to Matt Colyer for pointing me in the right direction for the URL.)
We may need some secrets or environment variables defined here and we would use them like this:
action "Deploy Webapp" { uses = ... args = "run some code here and use a $ENV_VARIABLE_NAME" secrets = ["SECRET_NAME"] env = { ENV_VARIABLE_NAME = "myEnvVariable" }
}
Creating a custom action
What we’re going to do with our custom action is take the commands we usually run to deploy a web app to Azure, and write them in such a way that we can just pass in a few values, so that the action executes it all for us. The files look more complicated than they are- really we’re taking that first base Azure action you saw in the GUI and building on top of it.
In entrypoint.sh:
#!/bin/sh
set -e
echo "Login"
az login --service-principal --username "${SERVICE_PRINCIPAL}" --password "${SERVICE_PASS}" --tenant "${TENANT_ID}"
echo "Creating resource group ${APPID}-group"
az group create -n ${APPID}-group -l westcentralus
echo "Creating app service plan ${APPID}-plan"
az appservice plan create -g ${APPID}-group -n ${APPID}-plan --sku FREE
echo "Creating webapp ${APPID}"
az webapp create -g ${APPID}-group -p ${APPID}-plan -n ${APPID} --deployment-local-git
echo "Getting username/password for deployment"
DEPLOYUSER=`az webapp deployment list-publishing-profiles -n ${APPID} -g ${APPID}-group --query '[0].userName' -o tsv`
DEPLOYPASS=`az webapp deployment list-publishing-profiles -n ${APPID} -g ${APPID}-group --query '[0].userPWD' -o tsv`
git remote add azure https://${DEPLOYUSER}:${DEPLOYPASS}@${APPID}.scm.azurewebsites.net/${APPID}.git
git push azure master
A couple of interesting things to note about this file:
set -ein a shell script will make sure that if anything blows up the rest of the file doesn’t keep evaluating.- The lines following “Getting username/password” look a little tricky — really what they’re doing is extracting the username and password from Azure’s publishing profiles. We can then use it for the following line of code where we add the remote.
- You might also note that in those lines we passed in
-o tsv, this is something we did to format the code so we could pass it directly into an environment variable, as tsv strips out excess headers, etc.
Now we can work on our main.workflow file!
workflow "New workflow" { on = "push" resolves = ["Deploy to Azure"]
}
action "Deploy to Azure" { uses = "./.github/azdeploy" secrets = ["SERVICE_PASS"] env = { SERVICE_PRINCIPAL="http://sdrasApp", TENANT_ID="72f988bf-86f1-41af-91ab-2d7cd011db47", APPID="sdrasMoonshine" }
}
The workflow piece should look familiar to you — it’s kicking off on push and resolves to the action, called “Deploy to Azure.”
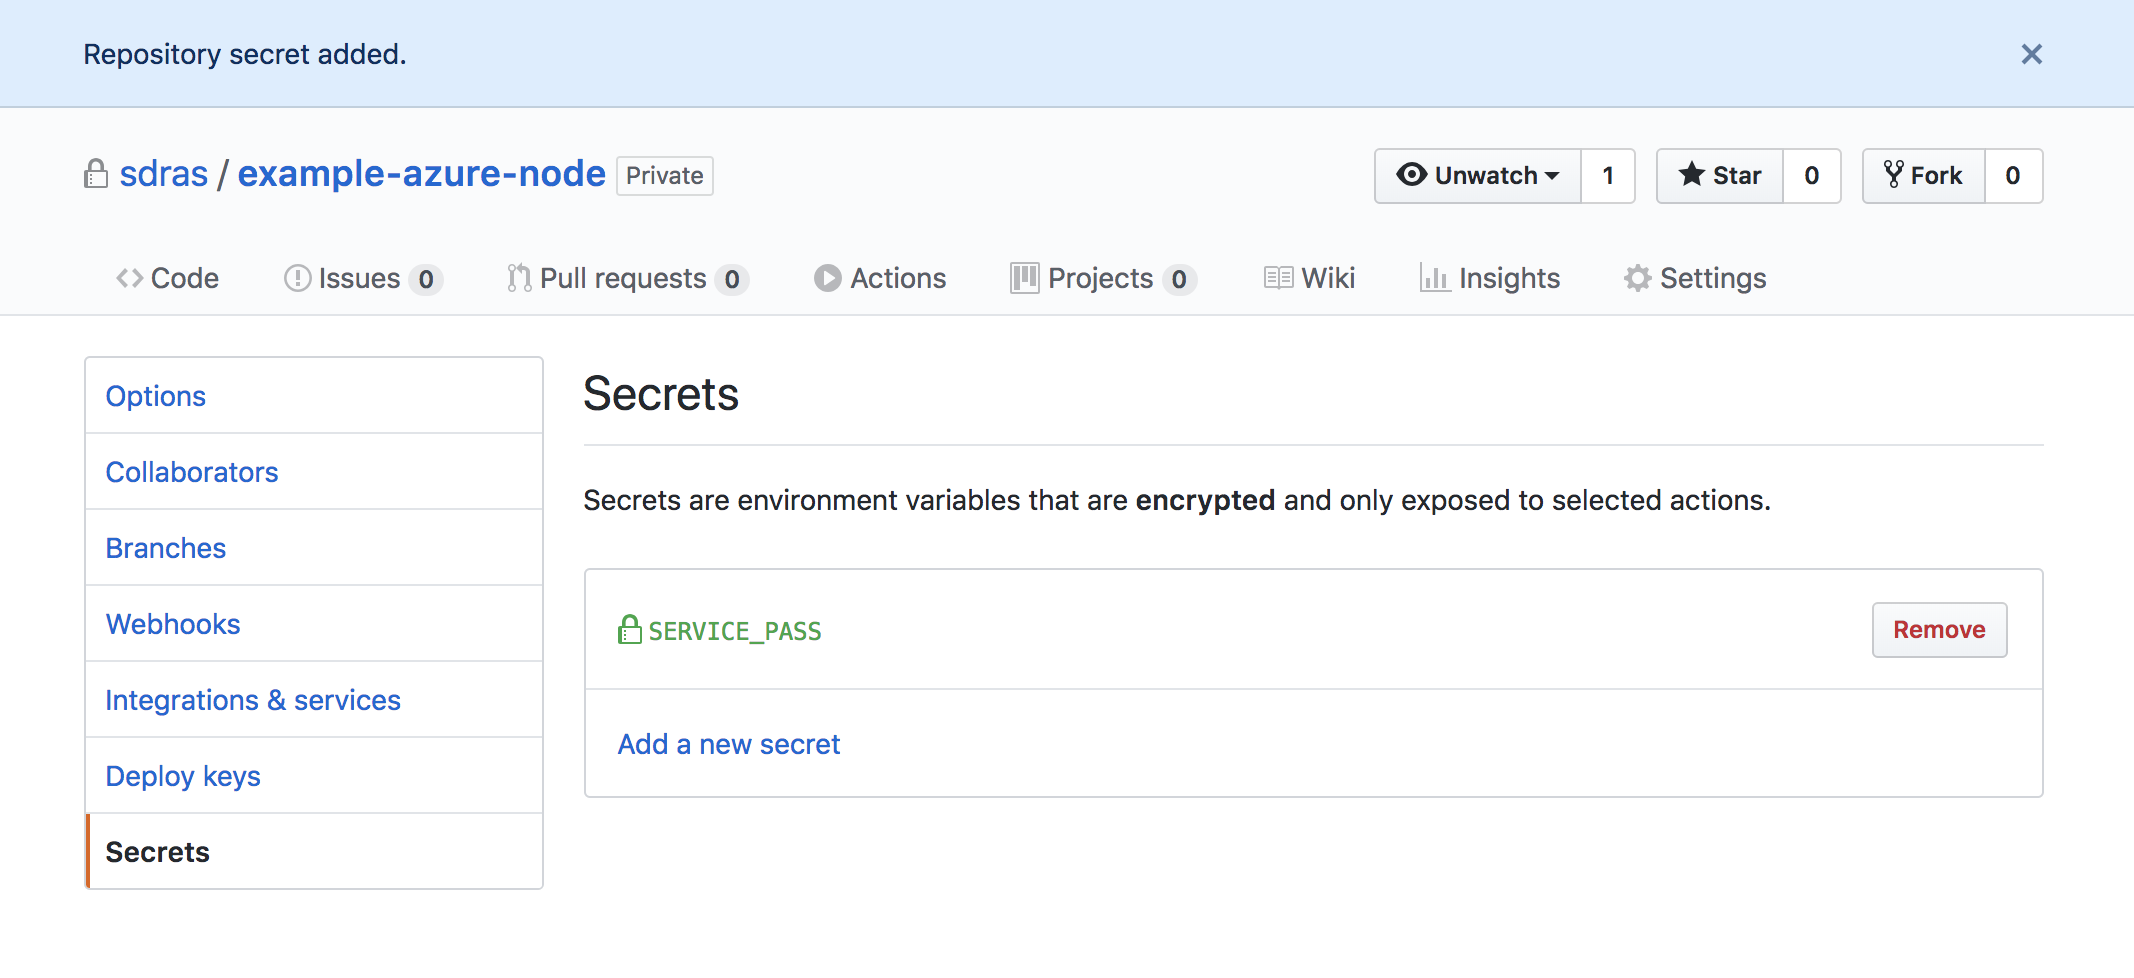
uses is pointing to within the directory, which is where we housed the other file. We need to add a secret, so we can store our password for the app. We called this service pass, and we’ll configure this by going here and adding it, in settings:
Finally, we have all of the environment variables we’ll need to run the commands. We got all of these from the earlier section where we created our App Services Account. The tenant from earlier becomes TENANT_ID, name becomes the SERVICE_PRINCIPAL, and the APPID is actually whatever you’d like to name it :)
You can use this action too! All of the code is open source at this repo. Just bear in mind that since we created the main.workflow manually, you will have to also edit the env variables manually within the main.workflow file — once you stop using GUI, it doesn’t work the same way anymore.
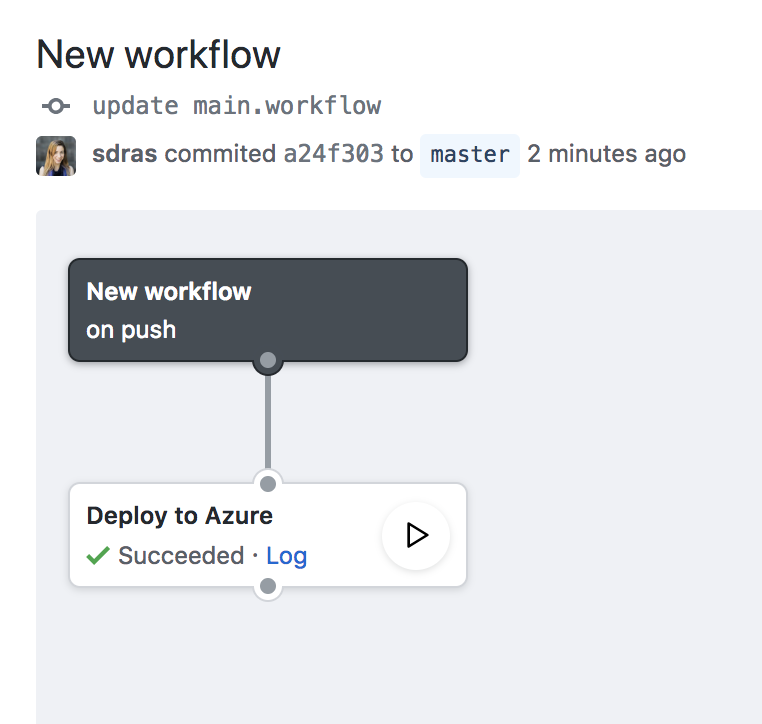
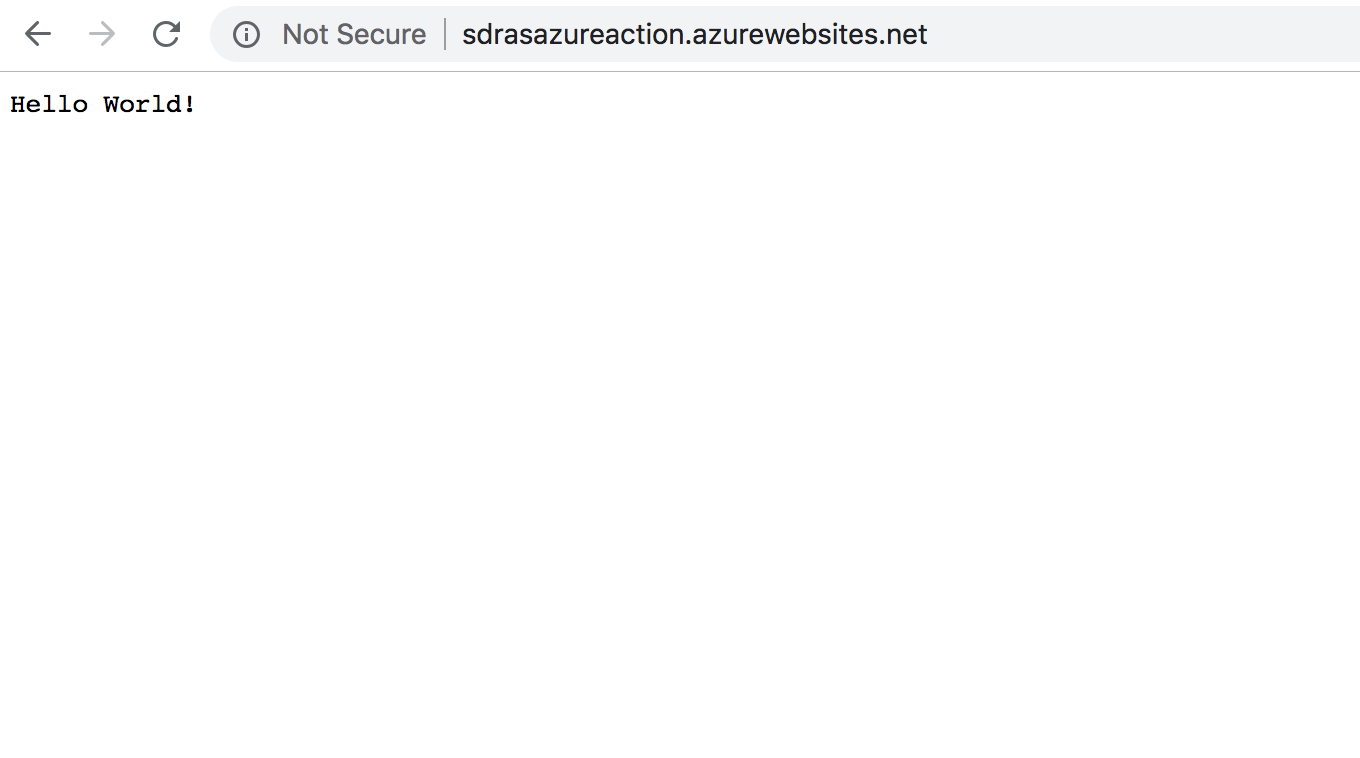
Here you can see everything deploying nicely, turning green, and we have our wonderful “Hello World” app that redeploys whenever we push to master 🎉
Game changing
GitHub actions aren’t only about websites, though you can see how handy they are for them. It’s a whole new way of thinking about how we deal with infrastructure, events, and even hosting. Consider Docker in this model.
Normally when you create a Dockerfile, you would have to write the Dockerfile, use Docker to build the image, and then push the image up somewhere so that it’s hosted for other people to download. In this paradigm, you can point it at a git repo with an existing Docker file in it, or something that’s hosted on Docker directly.
You also need to host the image anywhere as GitHub will build it for you on the fly. This keeps everything within the GitHub ecosystem, which is huge for open source, and allows for forking and sharing so much more readily. You can also put the Dockerfile directly in your action which means you don’t have to maintain a separate repo for those Dockerfiles.
All in all, it’s pretty exciting. Partially because of the flexibility: on the one hand you can choose to have a lot of abstraction and create the workflow you need with a GUI and existing action, and on the other you can write the code yourself, building and fine-tuning anything you want within a container, and even chain multiple reusable custom actions together. All in the same place you’re hosting your code.
The post Introducing GitHub Actions appeared first on CSS-Tricks.


